Creating a Halloween Shadow Theater
- Sep 4, 2024
- 2 min read
Updated: Nov 14, 2024

With Halloween just around the corner, I wanted to make something unique and special this year—something that would bring a little extra magic to our celebrations. After brainstorming different ideas, I decided on a Halloween Shadow Theatre Kit. I’ve always loved the spooky charm of Halloween, and I thought there was no better way to capture that eerie, storytelling atmosphere than with shadow puppetry.
Having a Cricut machine at home gave me the perfect opportunity to create intricate and beautiful designs, all while crafting something with my hands. It became more than just a DIY project— an experience full of creativity, discovery, and personal touches. Here’s a glimpse into how I made it happen, step by step.

Writing a story
Before starting the design, I created a short spooky story to make the process easier. It gave me a clear vision of the characters I needed, from a dancing skeleton to a mischievous cat.
Designing My Shadow Puppets
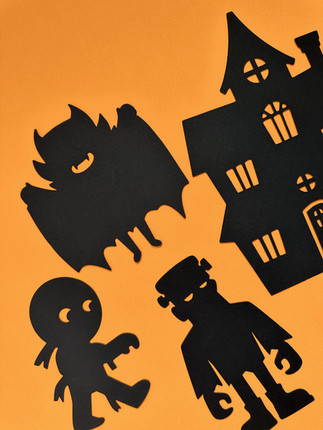
Once I had the story figured out, I started sketching my characters and decorations to make them more recognizable and easier for the Cricut to cut. I used Adobe Illustrator to turn those sketches into clean silhouettes, which made scaling them to the perfect size way simpler.
Packaging design
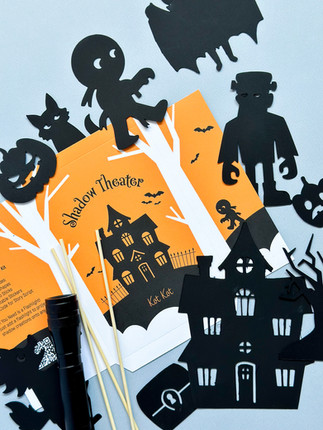
After finishing the puppet designs, I started thinking about the packaging. I wanted to keep it minimalistic but still bold and colorful. Since it’s a Halloween-themed project, orange and black immediately came to mind, and the combo worked perfectly. Personally, I love keeping things simple yet eye-catching, and the contrast between those two colors made the design pop. It gave the packaging just the right spooky vibe while still being sleek and modern—exactly what I was going for!
I printed the box design on my Canon image PROGRAF PRO-300, and it came out so vibrant! The colors really popped, especially with that bold Halloween vibe I was going for. After that, it was time for the Cricut to take over and do its thing—cutting everything out perfectly. Watching the Cricut work its magic was so satisfying, knowing that all the pieces were coming together just right. I was excited to see how everything would look when assembled!

Product Photography
Using gloves, I carefully peeled the shapes off the Cricut mat, making sure everything stayed clean and neat. The next step was to create the perfect product photos. I think this part is key since it's the "face" of your product. I made sure the layout was clean and well-organized, and that I had plenty of light to make everything look great. Taking the time to capture good photos really makes a difference and helps the product stand out!
Final Thoughts: Why This Project Meant So Much to Me
Looking back, creating this shadow theater kit was more than just a Halloween craft—it was a chance to use my Cricut and creativity to bring something truly special to life. Every step, from designing the puppets to building the stage for photos, felt personal.
I truly hope you and your family have as much fun with the kit as we did! Thank you so much for supporting my small business—it means the world to me. Your support helps me continue doing what I love!


